
In this article, I will show how to create simple Web-Content
Liferay provides CMS (Content Management System) functionality, by which we can add/update/delete various content on the fly (Without changing any code). Liferay also provides advance features like Publishing Web Content
Web contents are scoped by Community / Organization. So you need to first decide the Community / Organization in which you need a web content.
Community:- Community is a logical group of users, who are having common interest or skill.
Organization :- Organization is used to manage users in hierarchical manner.
Get more information about Community and Organization from http://www.liferay.com/web/jorge.ferrer/blog/-/blogs/7858337
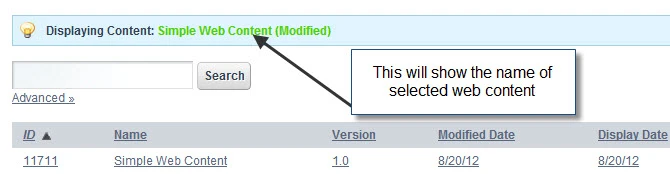
On clicking on this web content (on any column), the header section will show the selected web content name as per below screenshot.
Once we select the web content, just click on Save button at the end of the page. On successfully saving, it will show the success message at the top of configuration (pop up) window. After this you need to manually close it.
And its done. Our work is done. You will see our web content is being displayed by Web Content Display portlet as per below screenshot.
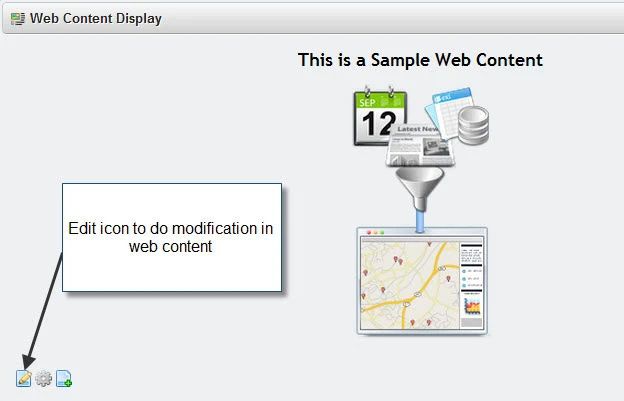
If you want, you can edit web content by just clicking on Edit icon shown at the lower left corner in above screenshot. On clicking on Edit link, it will open the web content in edit mode. Click on Return to Full Page on header section of web content or <<Back link to see all changes done.
For simplicity, I created content with just one line of text and one Image.
Try some hands-on with more rich content. In my next blog, I will show how to write more complex web content with the help of Structure and Template.
Liferay provides CMS (Content Management System) functionality, by which we can add/update/delete various content on the fly (Without changing any code). Liferay also provides advance features like Publishing Web Content
- using Workflow
- on Schedule
- With/Without Structure and Template
- on Staging/Production
Web contents are scoped by Community / Organization. So you need to first decide the Community / Organization in which you need a web content.
Community:- Community is a logical group of users, who are having common interest or skill.
Organization :- Organization is used to manage users in hierarchical manner.
Get more information about Community and Organization from http://www.liferay.com/web/jorge.ferrer/blog/-/blogs/7858337
Now
I will show you how to create Simple Web content and how to access it
with out of the box Web Content Display Portlet.
I
will first create community named Nilang.
We can create two types of pages (Public and Private) for community and on these
pages, we can place various portlets (out of the box and customized).
First open control panel by clicking on Manage-->Control Panel (From top horizontal navigation bar). You must be logged in to open the control panel.
First open control panel by clicking on Manage-->Control Panel (From top horizontal navigation bar). You must be logged in to open the control panel.
Control
panel is divided in four logical sections.
- Personal (You will find various tools which are user specific like personal pages, account etc)
- Content (You will find various out of the box portlets (shown as various icon) scoped by community / organization like Web Content,Blogs,Wiki,Polls etc)
- Portal (You will find various tools to manage various activities in portal instance)
- Server (You will find various tools to manage various activities in server).
Note:-
Liferay provides functionality by which we can create multiple
instance of portal on single liferay server.Individual instance
setting can be done through Portal section and Server (on which all
liferay instance are sited) setting can be done through Server
section in control panel.
We will first create community with Public page.
Creating Community :-
Fact about friendly URL:-

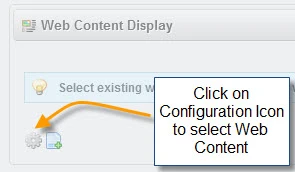
Click on Configuration icon at the end of the portlet window as per below screenshot.
Creating Community :-
- Click on Communities from portal section in control panel.
- You will find all created communities over here.
- To add new, click on Add button from right part of the page.
- Give community name as Nilang (Or whatever you want).
- Give appropriate description (like Community for Web content testing).
- Keep the type as Open (Which is by by default selected) and click on Save button without touching any other options.
You
will observed a new community named Nilang is created. Now We will
create a public page named "Web Content".
You
will observe Action button against each community.
Click
on Action button for community named Nilang and click on Manage
Pages.
You
will observe three links as per blow screenshot.
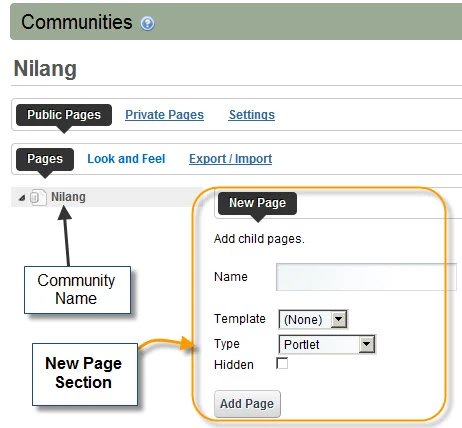
- Public Pages (By default selected)
- Private Pages
- Settings.
Again
under Public Pages there are another three links.
- Pages(By default selected)
- Look and Feel
- Export / Import.
Just
below that, you will observe the name of the community (Nilang) and its
right side, New Page section will be displayed.
Give
the name of page as "Web Content" and click on Add Page button without
touching any other options.
To
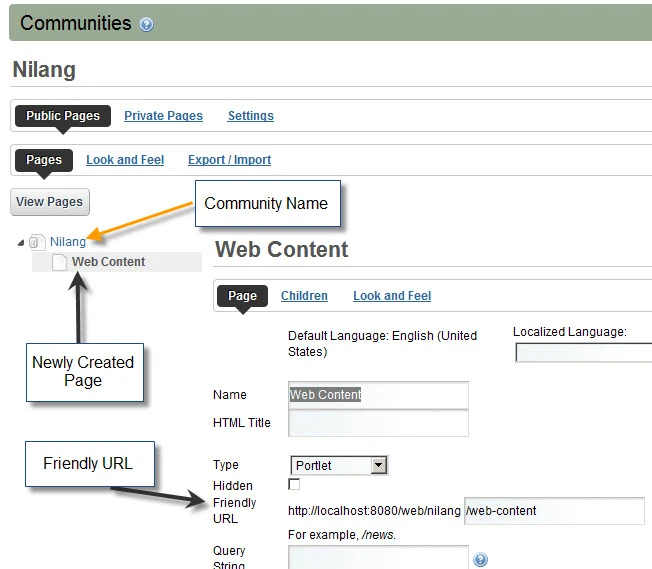
see the newly created page, click on tringle arrow just before the
name of the community name (Nilang) as per below screenshot.
Click
on page (Web Content) just below to Community Name (Nilang) and
then from right side section click on Page link. It will show full
details of this page.
Note:-
You will observe Friendly URL (one of the page attribute). Its value
will be something like http://localhost:8080/web/nilang/web-content.
Fact about friendly URL:-
- All public page's friendly URL will start with /web.
- All private page's friendly URL will start with /group.
- In above URL,Next to /web is /nilang. This is friendly URL of community(Nilang) and next to /nialng is /web-content which is friendly URL of this page.
- Liferay will automatically create friendly URL of page from its name (putting all alphabets in lower case and remove space with '-' (dash) character).
- Liferay also create friendly URL for community with same logic. (From communitie's name, making all alphabets in lower case and replacing all space with '-' (dash) character).
If you
want you can change the friendly URL of community. Follow below steps
to modify friendly URL of community.
- Click on Communities link from Portal section.
- Click on Action button and again click on Manage Pages.
- From the top three links (Public Pages(default selected link), Private Pages ,Settings), click on Settings.
- From the first link Virtual Host (By default selected), you will observe Friendly URL (/nialng) at the end of the page.
Till
now we are done with the half of the activity. Next we will create
web content for community Nilang.
Creating Web Content for community Nilang :-
Click on header section of content in control panel. You will
observed all communities and organization available as per below screenshot.
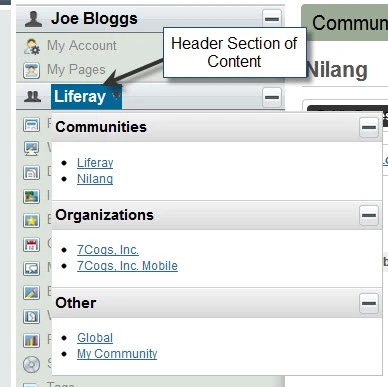
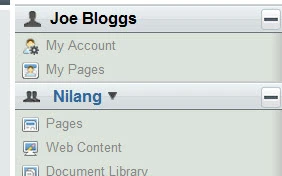
Now click on community Nilang. After clicking on
community Nilang, you will observed the title of the content section
will be Nilang (The selected community) as per below screenshot.
Now whatever content /other
thing we will create, it will be scoped by Nilang Community (means it
will be only available in Nilang community).
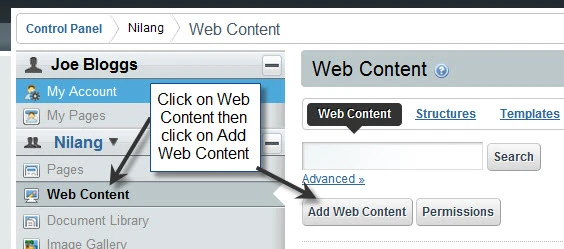
Click on Web Content from content section in control panel and click
on Add Web Content button from right side section as per below screenshot.
Now we can create actual web content.
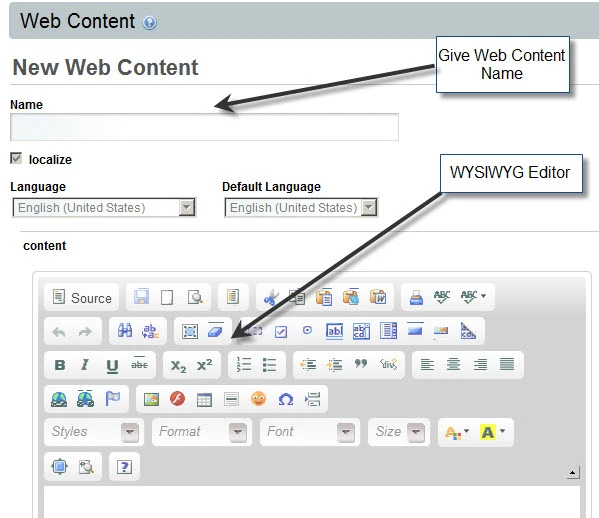
Give
name of the web content as 'Simple Web Content' and in the Content
section, you will observe a WYSIWYG editor with plenty of controls to
create web content as per below screenshot.
First
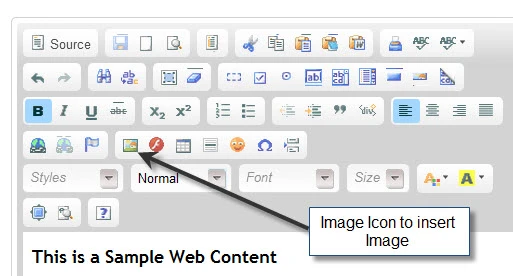
type "This is a Sample Web Content" inside WYSIWYG editor. We will also put an
image. On clicking on Image icon, pop-up window named "Image
Properties" will be opened.
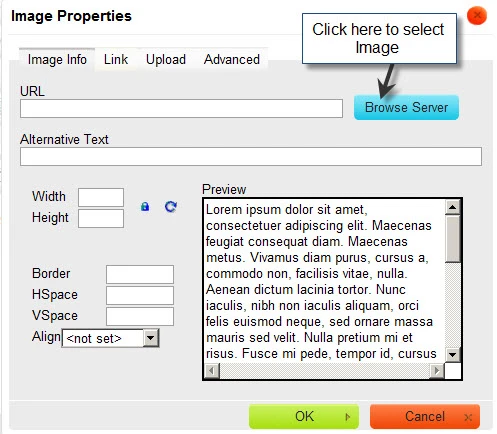
Now click on Browse Server button. You will
see few default created folders (This folder are part of Liferay CMS
and not the OS file system folder) as per below screenshot.
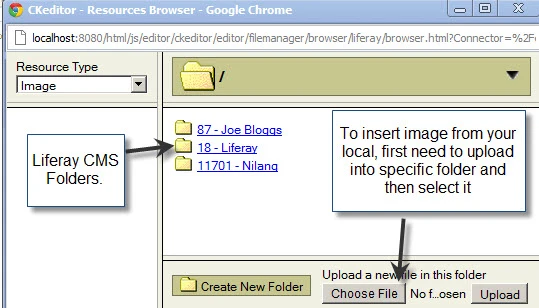
Click on 18-Liferay ( the number
18 may different in your case) and again click on Web Content folder
in it.
You will observe few images. Now click on portal_mashup.png.
Note:- you can also give the images that are present in your system.
However, this is not a window file selector so you cannot directly
point the image path on your local deives. For this, first you have
to upload that file to liferay CMS.
You
can point the actual image on your local drive by clicking on Choose
File button and then select the file and click on Upload button as mentioned in above screenshot.
Inshort,
first you have to import the images on local drive into the Liferay
CMS folder and then point it into your web content.
Once
the images has been choose, you can give value to other options in
different tabs (like Link and Advanced) in Image Properties popup window.
For
simplicity, we will not give other value and will just click on OK
button.
Now
image will be shown into the WYSIWYG editor. We also will do some
formatting. Press Ctrl + A to select all content in WYSIWYG editor
and make it center aligned. After this, it will looks like,
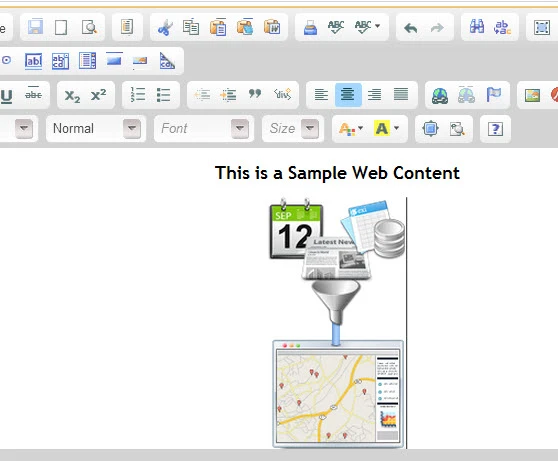
Our
web content is read to publish. Click on Publish button at the end of
the page.
On
successfully published, you will see the entry of this web content as
below.
Next
we will perform activity to show this content on community's page. We
will use Out of the Box portlet named Web Content Display Portlet to
show this web content.
Click
on Back to Liferay(from top horizontal navigation bar) will return back to guest community(Liferay community,
which is default community). Now click on Go To and click on Nilang from top horizontal navigation bar.
This will open public page (Web Content) which we created.
Click
on Add-->More from top horizontal navigation bar.
Just
type web content display and you will observe Web Content Display
portlet's name under Content Management category . Click on add link
againts it to place it on Web Content page as per below screenshot.
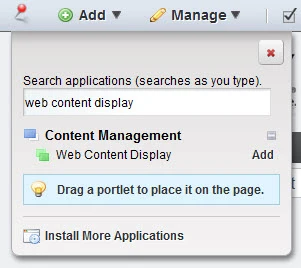
Once Web Content Display portlet placed on page, we need to configure it to show the web content we published.
Note:- Web Content Display portlet will display one content at a time.
Note:- Web Content Display portlet will display one content at a time.
Click on Configuration icon at the end of the portlet window as per below screenshot.
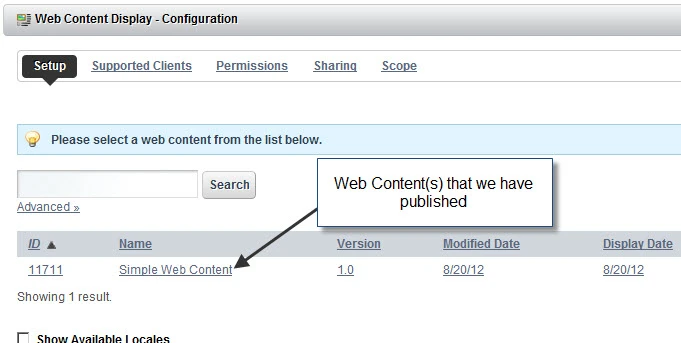
On clicking on Configuration icon, it will show configuration pop up window where all published content will be displayed as below screenshot.
On clicking on this web content (on any column), the header section will show the selected web content name as per below screenshot.
Once we select the web content, just click on Save button at the end of the page. On successfully saving, it will show the success message at the top of configuration (pop up) window. After this you need to manually close it.
And its done. Our work is done. You will see our web content is being displayed by Web Content Display portlet as per below screenshot.
If you want, you can edit web content by just clicking on Edit icon shown at the lower left corner in above screenshot. On clicking on Edit link, it will open the web content in edit mode. Click on Return to Full Page on header section of web content or <<Back link to see all changes done.
For simplicity, I created content with just one line of text and one Image.
Try some hands-on with more rich content. In my next blog, I will show how to write more complex web content with the help of Structure and Template.


How to keep the url same on editing.
ReplyDeletePlease reply asap.